
Exhibitor and Sponsor Forms
Exhibitor Booth Registration Form
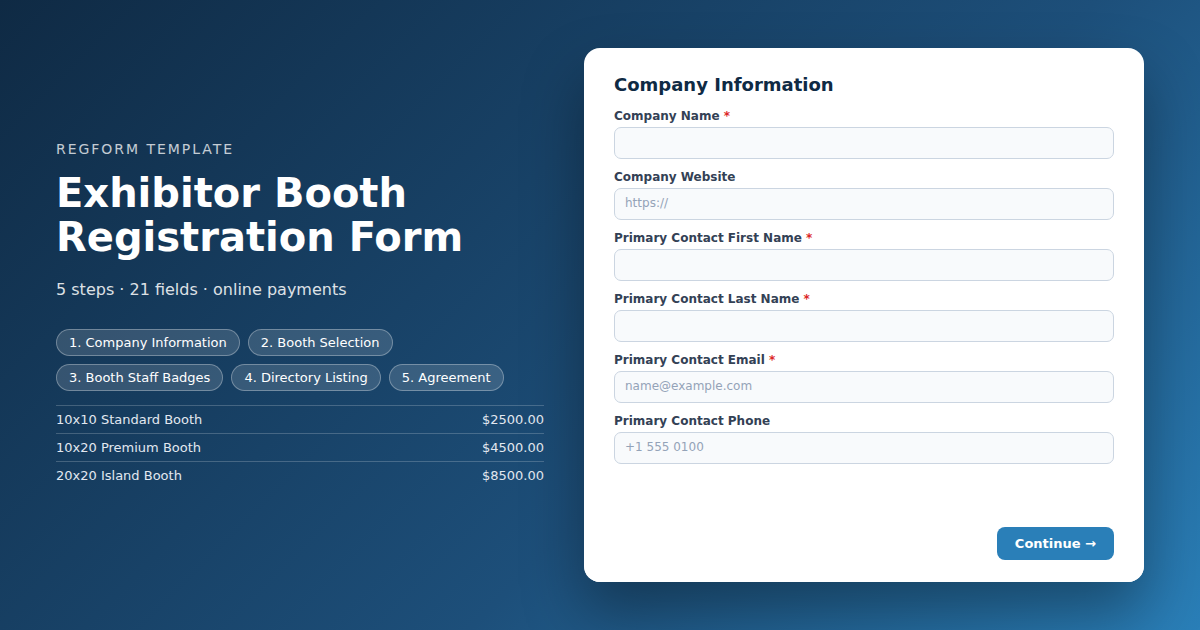
Sells floor space and captures the contract in one pass. Booth packages with real inventory caps and a waitlist, per badge staff details, directory listing assets, and purchase order billing.
Overview
An exhibitor form is doing three jobs at once. It sells floor space, it collects the contract acceptance that makes the sale binding, and it gathers everything your show team will otherwise chase by email in the fortnight before doors open. Most organizers split those across a PDF, a spreadsheet and a payment link. This template does them in one pass.
What makes it different from attendee registration
The buyer is a company, not a person. Inventory is genuinely finite, because a floor plan has a fixed number of each booth size. Badges come in allocations rather than one per registration. And the money almost always arrives on a purchase order, weeks later, from somebody in accounts payable who has never heard of your show.
Who it is for
Trade show organizers, association meeting teams selling an expo hall, and conference organizers with a sponsor or partner floor. If you sell fewer than a dozen booths and know every exhibitor personally, this will be heavier than you need.
How to adapt it
Booth inventory and the badge allowance are the two things that need real numbers before anything else matters. Set those from your floor plan, put your actual contract terms in the legal field, and the rest is assembly. Cut the directory listing section only if you genuinely do not publish an exhibitor directory.
Form field list
Company Information
| Field | Type | Required | Notes |
|---|---|---|---|
| Company Name | text |
Required | — |
| Company Website | text |
Optional | — |
| Primary Contact First Name | text |
Required | — |
| Primary Contact Last Name | text |
Required | — |
| Primary Contact Email | email |
Required | — |
| Primary Contact Phone | phone |
Optional | — |
Booth Selection
| Field | Type | Required | Notes |
|---|---|---|---|
| Booth Package | item_select |
Required | — |
| text_block | text_block |
Optional | — |
| Location Preference | dropdown |
Optional | — |
| Companies You Would Like to Be Near or Away From | textarea |
Optional | — |
| Do You Need Electrical Service | radio |
Optional | — |
| Electrical Requirements | textarea |
Optional | — |
Booth Staff Badges
| Field | Type | Required | Notes |
|---|---|---|---|
| text_block | text_block |
Optional | — |
| Additional Staff Badges | item_select |
Optional | — |
Directory Listing
| Field | Type | Required | Notes |
|---|---|---|---|
| Directory Listing Description | textarea |
Optional | — |
| Logo File Link | text |
Optional | — |
| Product Categories | checkbox |
Optional | — |
| Show Special or Booth Activity | text |
Optional | — |
Agreement
| Field | Type | Required | Notes |
|---|---|---|---|
| Certificate of Insurance Link | text |
Optional | — |
| Exhibit Space Agreement | legal |
Required | — |
| We have read the exhibitor rules and regulations and will comply with move in and move out schedules | checkbox |
Required | — |
How it's built in Regform
Setup checklist
- Load your booth inventory as cart items with caps. Each package is an item with its own price and quantity cap, so a sold out size closes itself rather than being oversold and then apologised for. Set the caps to the real floor plan count, not an optimistic one.
- Put the exhibit contract in the legal field. The consent step uses a legal field, which can hold your terms inline or point at the contract PDF you already have. This is how the form doubles as a signed exhibit space agreement rather than just an order.
- Decide the included badge allowance. The staff badge item is priced per badge. State in the package description how many are included so exhibitors know what they are buying, then let them add extras through the quantity control.
- Turn on invoice billing. Most exhibit space is bought on a purchase order. The invoice integration routes those to a pending payment status with a due date, so your finance team can chase them without you tracking a spreadsheet.
- Collect the directory listing while you have their attention. The description, categories and logo link are the things you will otherwise chase by email three weeks before the show. Asking here costs nothing and saves a round of follow ups.
- Set the space assignment expectation. The form takes a location preference, not a booth number. Say clearly that assignment happens after contracting, or you will spend the week after launch explaining it.
Before you publish
Buy each package with a test card and confirm the totals and the badge quantity behave. Fill one package to its cap and check it closes cleanly. Then run one submission through the invoice path and confirm it lands unpaid with the purchase order reference attached.
Frequently asked questions
How do I stop selling a booth size once it is gone?
Each booth size is a separate cart item with its own price and quantity cap. When a size sells out it queues to the waitlist rather than blocking checkout, so an exhibitor is captured instead of lost. Set the caps from your actual floor plan and decide whether you want sold out sizes to queue or simply close.
Can this double as the exhibit space contract?
Through the legal field on the consent step, which can hold your terms inline or link the contract document you already use. Acceptance is recorded with the submission, so the registration and the agreement are the same record rather than two things somebody has to reconcile later.
How are booth staff badges handled?
Staff badges are a priced item with a quantity, and each badge opens its own set of questions for the name, title and email of the person wearing it. State the included allowance in the package description and let exhibitors buy extras from the same control. Every badge becomes its own record for printing.
Can exhibitors pay by purchase order?
Yes, and you should expect it to be the normal case rather than the exception. Exhibit space is usually bought through procurement. The invoice integration routes those submissions to a pending payment status with a due date, while card payers complete at checkout through Stripe in the usual way.
What about the show directory listing?
Ask for it here rather than chasing it later. The form collects the listing description, the product categories and a link to the logo. Those are exactly the assets that go missing in the final fortnight before a show, and exhibitors are far more responsive while they are still in the act of buying space.
How do I collect logos and insurance certificates?
This template collects links to them, because the template format cannot carry a file upload field. Regform itself supports uploads, so once you have imported this template you can swap either link field for a real upload in the builder, with your own file type and size limits. If you would rather not, a link to a shared drive works and keeps the form shorter.
Should exhibitors choose their own booth number?
Take a preference, not a selection. The template asks for a location preference and any adjacency requests, and assignment happens afterwards once contracts are in. Letting exhibitors pick a specific booth number from a form creates conflicts you then have to unwind by hand, and it fights with how most floor plans are actually sold.
Browse related categories
Form type: Exhibitor and Sponsor Forms
Use cases: Group and Team Registration Exhibitor and Sponsor Management
Capabilities: Capacity Limits Conditional Logic Confirmation Email Payment Collection Repeating Sections Invoice and Purchase Orders
Ready to launch your exhibitor booth registration form?
Tell us about your event and we'll set this template up with you — fields, logic, payments, and all.
- Multi-step forms & conditional logic
- Built-in checkout, payments & invoicing
- Event registration, reporting & team roles
Use This Template
We'll reach out and get you building.
Download template (JSON)Import the file with the builder's Import button in your own account.
Already have an account? Sign in